


Spray.io尝试 使用Spray.io搭建Rest服务 Spray.io搭建Rest — 支持Twirl模板并部署 Spray.io搭建Rest — 支持WebSock
Spray.io尝试
Spray.io 支持Twirl模板并部署
今天我们在上一篇的基础上添加集成Twirl模板功能以及怎样去打包运行。
项目地址:http://git.oschina.net/for-1988/Simples/tree/master/SpraySimpleTwirl
Twirl是 Play Framework 的scala默认模板引擎,它是可以独立运行在任何一个Scala项目中的,并不依赖任何Play的东西。Twirl受.NET MVC的Razor灵感启发,语法跟Razor十分相似,写.net的时候用过一次。感觉非常不错。Twirl模板通过sbt-twirl插件会被预先编译成scala代码,然后在我们的代码中可以直接调用这个模板对象,给它参数,然后渲染。所以它并不依赖web环境,任何scala工程都可以直接使用。
添加Twirl支持
添加sbt-twirl插件,我们在工程的project中新增plugin-twirl.sbt文件
resolvers += Classpaths.sbtPluginSnapshotsaddSbtPlugin("io.spray" %% "sbt-twirl" % "0.7.0")然后在build.sbt文件中,加入Twirl的配置
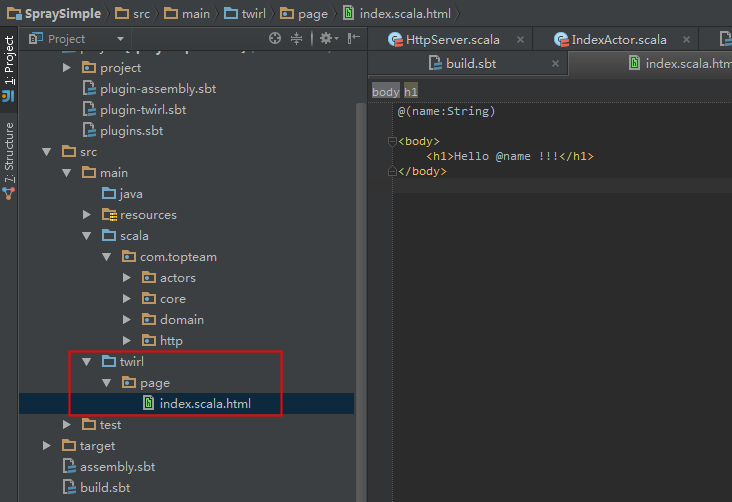
import twirl.sbt.TwirlPlugin.Twirl//... Other settingSeq(Twirl.settings: _*)在工程中,添加source目录 src.main.twirl 并创建index.scala.html文件
路由返回HTML
path("html" / Segment) { message => get { respondWithMediaType(`text/html`) { encodeResponse(Gzip) { complete(page.html.index(message).toString()) } } } } ~让一个请求返回Html格式的代码,只需通过respondWithMediaType来指定返回的Content-Type的值。
返回json的话,可以让我们的类继承于Json4sSupport,然后实现隐式方法 implicit def json4sFormats: Formats = DefaultFormats 就可以了,但是这样做如果你的一个处理类需要同时支持json跟html的话,就会出现问题。所以我们下面做了一下简单的封装
同时支持模板和Json
import spray.routing._import spray.routing.directives.RespondWithDirectivesimport spray.http.MediaTypes._import spray.httpx.marshalling.Marshallerimport spray.http.ContentTypesimport org.json4s.native.Serializationimport org.json4s.{DefaultFormats, Formats}import spray.httpx.encoding.Gzipimport akka.actor.ActorSystem/** * Created by JiangFeng on 2014/4/29. */trait DefaultDirectives extends Directives { this: RespondWithDirectives => implicit def json4sFormats: Formats = DefaultFormats def responseJson(obj: AnyRef): Route = { respondWithMediaType(`application/json`) { implicit def json4sMarshaller[T <: AnyRef] = Marshaller.delegate[T, String](ContentTypes.`application/json`)(Serialization.write(_)) complete { obj } } } def responseHtml(html: String)(implicit system: ActorSystem): Route = { respondWithMediaType(`text/html`) { encodeResponse(Gzip) { complete(html) } } }}
class IndexActor extends Actor with ActorLogging { override def receive = { case None => }}class IndexService(index: ActorRef)(implicit system: ActorSystem) extends DefaultDirectives { lazy val route = path("echo" / Segment) { message => get { responseHtml { page.html.index(message).toString() } } } ~ path("person") { get { responseJson { val person = new Person("Feng Jiang", 26) person } } }}
打包运行
spray.io是通过main方法启动,所以我们需要将工程打包成Runable JAR。我们需要借助 sbt-assembly 插件。同样的project 目录中添加 plugin-assembly.sbt文件
addSbtPlugin("com.eed3si9n" % "sbt-assembly" % "0.11.2")我们再在工程的根目录下添加一个 assembly.sbt 文件
import sbtassembly.Plugin._import AssemblyKeys._assemblySettingsjarName in assembly := "SpraySimple.jar"name := "SpraySimple"version := "1.0"scalaVersion := "2.10.3"scalacOptions := Seq("-unchecked", "-deprecation", "-encoding", "utf8")> sbt然后执行 assembly 命令
sbt > assembly
然后,我们可以看到打包生成到的目录 ~/target/scala-2.10 下面,执行该JAR文件
> java -jar SpraySimple.jar