


前两篇的连接到这里: Solr环境搭建及IK分词的集成及solrJ的调用(一)http://my.oschina.net/zimingforever/blog/120732 Solr环境搭建及
前两篇的连接到这里:
Solr环境搭建及IK分词的集成及solrJ的调用(一) http://my.oschina.net/zimingforever/blog/120732
Solr环境搭建及IK分词的集成及solrJ的调用(二) http://my.oschina.net/zimingforever/blog/120928
第一篇讲了如何搭建solr环境,第二篇讲了如何在solr中加入IK的分词。本篇主要介绍如何使用solrJ,solrJ是java客户端调用的api
首先在pom中引入solrJ
<dependency> <groupId>org.apache.solr</groupId> <artifactId>solr-solrj</artifactId> <version>3.6.0</version></dependency><dependency> <groupId>org.apache.solr</groupId> <artifactId>solr-core</artifactId> <version>3.6.0</version></dependency>接着是solrJ的一些主要用法:
A如何获取一个solrServer并清空里面的索引
public static SolrServer getSolrServer() throws IOException, SolrServerException { //连接到solr String solrServerUrl = "http://localhost:8084/solr"; SolrServer solrServer = new CommonsHttpSolrServer(solrServerUrl); // 清空之前建立的索引数据 solrServer.deleteByQuery("*:*"); return solrServer;}SolrInputDocument doc1 = new SolrInputDocument();doc1.addField( "id", "id1", 1.0f );doc1.addField( "name", "doc1", 1.0f );doc1.addField( "price", 10 );SolrInputDocument doc2 = new SolrInputDocument();doc2.addField( "id", "id2", 1.0f );doc2.addField( "name", "doc2", 1.0f );doc2.addField( "price", 20 );Collection<SolrInputDocument> docs = new ArrayList<SolrInputDocument>();docs.add( doc1 );docs.add( doc2 );server.add( docs );server.commit();然后把这两个文档放到一个collection中,然后加入到server中,并做一个commit。
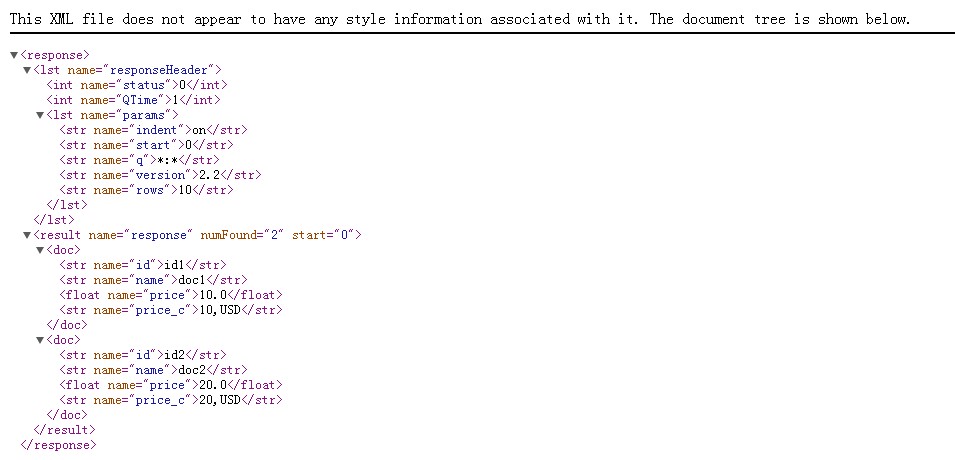
这时候solr中就有内容了。可以访问这个地址试试:http://localhost:8084/solr/select/?q=*%3A*&version=2.2&start=0&rows=10&indent=on 会出现索引的内容
C 使用addBean增加索引
上面使用的是solrDocument对象增加的索引,其实还有更方便的方法增加索引,方法如下:
Collection<SeacheIndexDO> solrInputDocs = new ArrayList<SeacheIndexDO>();for(SpiderResultDescribeDO spiderResultDescribeDO:spiderResultDescribeDOs){ SpiderResultInforDO spiderResultInforDO= (SpiderResultInforDO) sqlMapClient.queryForObject("hunter.getSpinderInfor", spiderResultDescribeDO); String fileType=spiderResultInforDO.getUrlKey(); String fileFullName= AddressUtils.appendUrl(spiderResultInforDO.getBaseUrl(),spiderResultInforDO.getFileName()); String fileContent=FileUtils.getFileStringByPath(fileFullName, Commons.DEFAULT_DB_CHARSET); SeacheIndexDO solrInputDoc=new SeacheIndexDO(); //id是唯一标示,url是跳转的连接 solrInputDoc.setId(spiderResultInforDO.getId()); solrInputDoc.setHunterUrl(spiderResultInforDO.getUrl()); solrInputDoc.setHunterTitle(spiderResultInforDO.getTitle()); if(fileType.equals(SpiderSourceType.DBA_WIKI.getStringValue())){ solrInputDoc.setHunterContent(fileContent); }else { System.out.println("不支持的类型"); } solrInputDocs.add(solrInputDoc);}//增加文档solrServer.addBeans(solrInputDocs);// 提交solrServer.commit();这里要注意一下,SearchIndexDo是我自定义的类,它里面的属性solr是不认识的,也不知道如何去做索引,所以这个地方必须要把这些属性字段在schemal中做配置
<!--自定义的分词部分--><field name="hunterTitle" type="text" indexed="true" stored="true" /><field name="hunterAuthor" type="string" indexed="true" stored="true" /><field name="hunterContent" type="text" indexed="true" stored="true" /><field name="hunterQuestion" type="text" indexed="true" stored="true" /><field name="hunterAnswers" type="text" indexed="true" stored="true" /><field name="hunterCreateTime" type="date" indexed="true" stored="true" /><field name="hunterUpdateTime" type="date" indexed="true" stored="true" /><field name="hunterUrl" type="string" indexed="true" stored="true" /><field name="hunterAll" type="text" indexed="true" stored="false" multiValued="true"/><!-- 自定义的copyfiled --> <copyField source="hunterContent" dest="hunterAll"/> <copyField source="hunterTitle" dest="hunterAll"/>
另外还要注意的一点是在bean中对应schemal的字段要加上@Field的注解
D 如何读取solr的data,上面的列子其实就是一个读取*:*的查询
q=*%3A*&version=2.2&start=0&rows=10&indent=on
这里有几个参数q,start,rows,还有几个常用的参数如下:
// q - 查询字符串,必须的。// fl - 指定返回那些字段内容,用逗号或空格分隔多个。// start - 返回第一条记录在完整找到结果中的偏移位置,0开始,一般分页用。// rows - 指定返回结果最多有多少条记录,配合start来实现分页。// sort - 排序,格式:sort=<field name>+<desc|asc>[,<field name>+<desc|asc>]… 。示例:(inStock desc, price asc)表示先 “inStock” 降序, 再 “price” 升序,默认是相关性降序。// wt - (writer type)指定输出格式,可以有 xml, json, php, phps, 后面 solr 1.3增加的,要用通知我们,因为默认没有打开。// fq - (filter query)过虑查询,作用:在q查询符合结果中同时是fq查询符合的,例如:q=mm&fq=date_time:[20081001 TO 20091031],找关键字mm,并且date_time是20081001到20091031之间的E 查询的代码如下:
SolrServer server= GetSolrServer.getSolrServer();SolrQuery query = new SolrQuery();query.setQuery( "*:*" );query.addSortField( "price", SolrQuery.ORDER.asc );QueryResponse rsp = server.query( query );SolrDocumentList docs = rsp.getResults();List<Item> beans = rsp.getBeans(Item.class);//设置高亮 给hunterConntent及hunterTitle设置高亮,并设置成红色的格式 solrQuery.setHighlight(true); solrQuery.addHighlightField("hunterTitle"); solrQuery.addHighlightField("hunterContent"); solrQuery.setHighlightSimplePre("<font color=/"red/">"); solrQuery.setHighlightSimplePost("</font>");获取高亮的代码如下,它和获取查询结果返回的对象不是一个,还要分别处理,代码上也有些“不干净”
Map<String, Map<String, List<String>>> queryResponseHighlighting =queryResponse.getHighlighting();G 另外之前提到了在自定义的field中我做了一个hunterAll字段
//设置查询的范围 solrQuery.set("df",queryFiled); //设置查询的字 solrQuery.setQuery(queryText);H 另外返回查询的状态和时间如下:
//获取status int responseStauts=queryResponse.getStatus(); //获取responseTime int responseTime=queryResponse.getQTime();总结一下:本篇博客主要介绍了solrj的常用使用方法,我基本上使用上面的代码接完成了建立索引和查询。另外结合前两篇的博客基本上可以使用简单的solr了。
